How to Transfer an Image Onto Glass
Photographs are typically printed on paper, canvas, or metal. But, now high-quality printing of images and designs has become very trendy. Besides buying pricey printed glasses from online websites and galleries, you can print a photo on glass at home too. Isn’t it amazing to print any design, image/family photo of your own choice on the glass and hang them on the wall.. Additionally, you can make beautiful customized coasters for your home, family, and close friends and even for your clients to earn money. Without wasting any time, let’s get into it.
Ways of Printing Photos on Glass at Home
The simple and easiest way of printing photos on glass at home can be done by either use of the Mod Podge or the adhesive packing tape technique. Both techniques are straightforward to learn but quite different from each other to some point. But, don’t worry, I am going to give you the complete guide of both ways in detail, including the material required and the steps. Let’s get started.
1. Mod Podge Technique:
Mod Podge Photo Transfer is a liquid-based photo transfer that creates an instant mirror-like finish on a variety of surfaces, including glass, wood, metal, ceramic, and more. It dries clear and protects the surface, making it perfect for decorating, framing, and displaying.
The Mod podge Method requires some trial and error before you get the hang of the process. If you fail the first, second, or even tenth time, Don’t get discouraged at all. Just keep trying as once you learn this technique of photo transfer to glass, the process will be pretty fast.
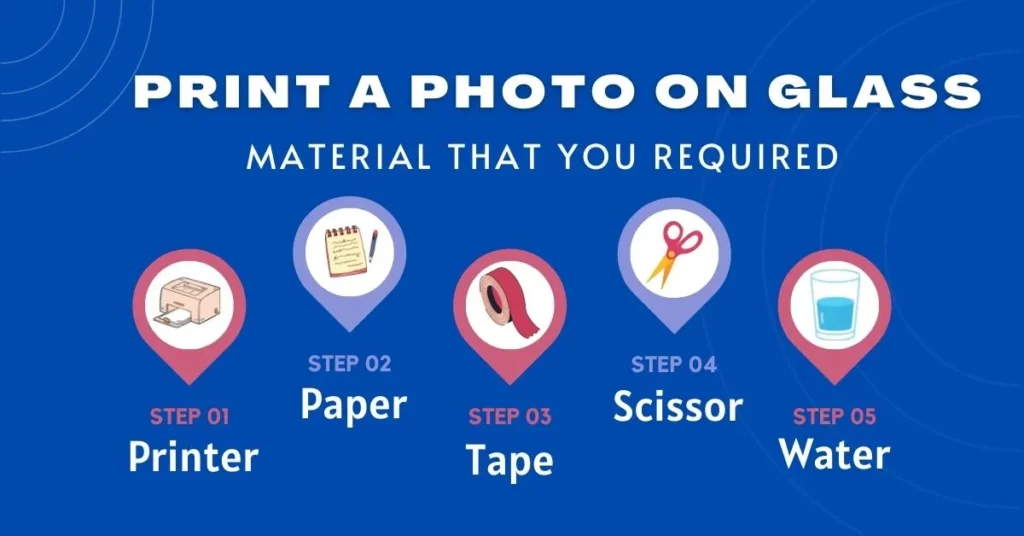
Material Required
Here is the list of items that you will be required for photo transferring on glass at home. Remember, only the right material and right technique can produce the desired results.
- Glass for decor – if you are doing it the first time, it’s better to choose a flat glass surface instead of a curved glass shape.
- A bottle of Mod podge (photo transfer medium formula).
- A laser printer
- A plain printer paper
- A pair of scissors
- Few sheets of wax paper
- Foam brush/sponge
- Some water
After collecting the required material, the procedure for this method is really simple. You just need to follow the steps given below and everything will be done…
Step 1 – Print out your design
If the image you want to transfer is already available digitally, then it’s ready to be printed. Otherwise, edit or finalize the design in any picture editing app like photoshop, CorelDraw, etc. for printing, I suggest you use a laser printer and plain printing paper for this job. Avoid transferring an image printed with an inkjet printer.
Pro tip: If you’re running a business, always ask your clients for their customized designs/images. You can also choose an image from Pinterest, a magazine/newspaper page, or any film-developed photograph.
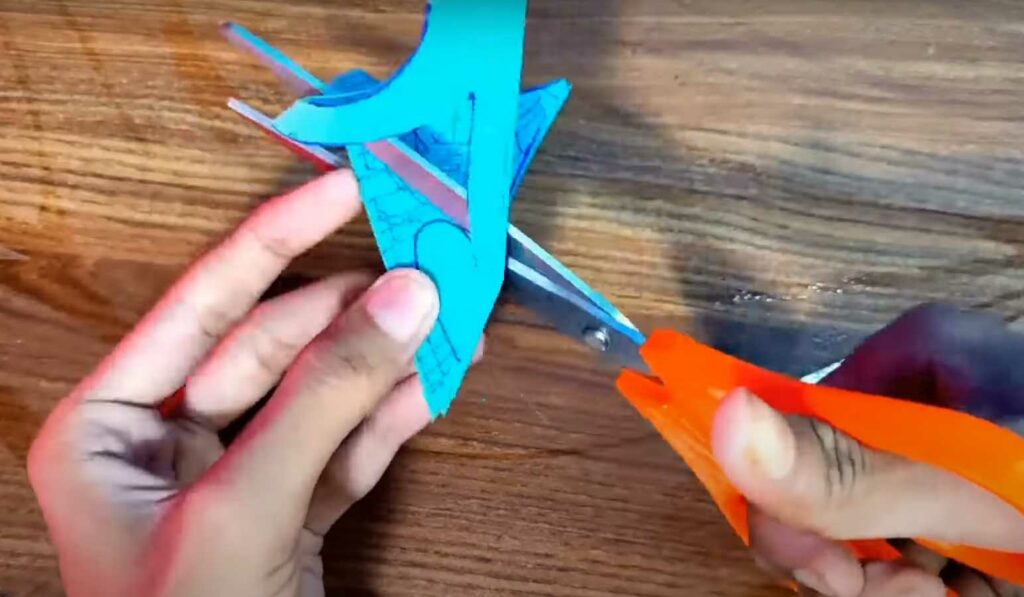
Step 2 – Trim the design
Once your design/image has been printed, trim the white space with scissors. You have to crop the image so that it fits on your glass surface, perfectly. Ensure to leave a 1/2-inch to 1-inch border around your image. See the image given below.
Step 3 – Put the image on wax paper
On a flat surface, spread out a sheet of wax paper. If you don’t have wax paper, a silicone mat can also be used. Now, place your trimmed design on wax paper while facing up. The wax paper will help to keep the mess to a minimum and your paper stays in place while you apply to transfer medium ( mod podge) to it.
Additionally, to keep your wax paper in place, you can place something heavy on the ends of it or tuck the ends under the edge of your table if possible.
Step 4 – Apply mod podge to the design
After placing the design on a wax sheet, dab your foam brush in Mod Podge and apply it to the front of your design. You can also apply a large glob of Mod Podge directly to your design/image and spread it around with the foam brush.
Apply a thick, even layer of Mod Podge to the entire area with broad strokes until you should not be able to see through the Mod Podge layer. Keep your strokes in the same direction, either horizontally or vertically, for the best results. Watch out for this video by Growing Craft, to learn how to print photos on glass at home with mod podge.
Step 5 – Let the design dry for 24 hours
After you’ve finished applying Mod Podge to your design, set it aside on a new wax paper for 24 hours. It is critically important that the design remains still and faced up during the drying time. Depending on the humidity in your area, it may take longer to dry completely.
The best results are obtained by performing this procedure in a room that maintains a constant temperature of 60 – 80°F. Moreover, avoid using a heat source or a fan for drying. Air dry is highly recommended.
Step 7 – Wet the back of the image
After the design gets fully dry, transfer it to another clean wax paper. Turn it over to access the back of the design’s page. Dip a sponge into the water. Don’t squeeze out the sponge before applying it to the design. You want the water to break down the paper’s construction so you can create your decal.
Place the sponge on the back of your paper and start blotting the area where you want to work. Rub the sponge against the paper to release the water. Depending on the size of the design, you may need to wet your sponge frequently throughout the process.
Step 8 – Rub against the paper on the reverse of the image
As you wet the back of the design, apply medium pressure and rub your finger against the paper. You will notice the material peeling away. To avoid ripping the design, do not rub it too hard or stay in the same area for too long. If the area begins to dry out, rewet it before proceeding.
In most cases, the first wipe will not remove all of the paper. The best option is to rub your picture down once, then let it dry before repeating the process. Generally, it takes 2 to 3 repeats for the desired results. See the image given below to understand visually.
Step 9 – Let the design dry
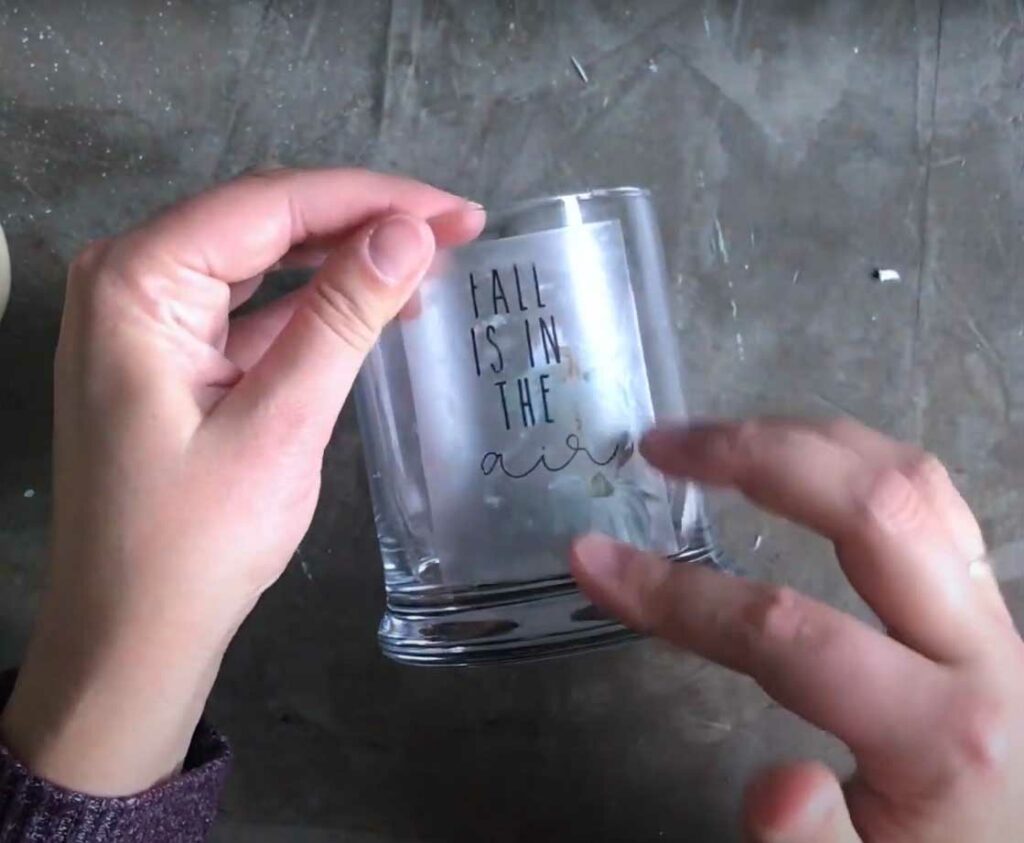
Set your paper aside to let it dry once you’ve finished rubbing it down. However, check for areas where the paper is too thick at any area and needs to be rubbed more. If you’re satisfied with your final product, proceed to the next step transferring your image to the glass. It’s best to place your design exactly where you want it, before attempting to transfer it to the glass surface. Because once adhered to, it will be challenging to remove the design without damaging it.
Step 10 – Adhere the design to the glass after final trimming
After the design has dried completely, do the final trimming to remove any excess white space. If necessary, you can also trim any excess Mod Podge photo transfer with an Exact knife. Now, transfer your Mod Podge photo transfer decal from wax paper to your glass surface, carefully. Because after the design/image will be adhered to the glass it’s impossible to get removed without damage.
Don’t apply pressure to the design transfer until it is properly positioned. Smoothen the Mod Podge photo transfer against the glass with your fingers to remove any air bubbles.
Important: As Mod Podge photo transfer medium is a three-in-one product, your image transfer should remain permanently adhered to the glass surface. However, some people apply a thin layer of sealant over the top of their printed photographs/designs to ensure that they last longer. If you intend to use a glass item frequently, such as glass, it is best to apply a protective layer over your designs for longer-lasting results.
2. Adhesive Packing Tape Technique:
For this method of transferring photos on glass at home, you have to use adhesive packing tape as a photo/design transferring medium instead of mod podge on glass. Let’s get started. The following items given below will be required in this method of transferring photos on glass.
- Credit card
- Blow dryer
- Sublimation printer
- A pair of Scissors
- Glass of warm water
- Adhesive packing tape
The procedure for this method isn’t very difficult, but yes you have to stay precise to achieve the best-desired results.
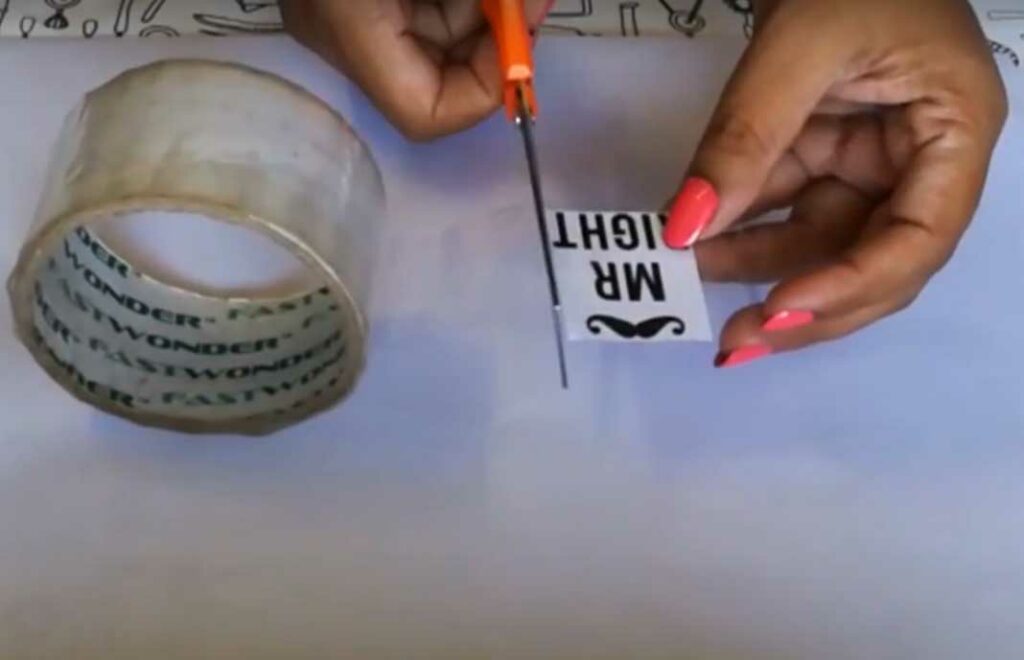
Step 1 – Print out the design
Select the image/design that you need to transfer to glass and finalize its editing. Print the image only using a laser printer. Trim the design to the closet outline, but leave a ½ to 1-inch border around the design.
Step 2 – Place a piece of packing tape over the image
Apply a piece of clear adhesive packing tape directly to the printed image/design. Check that the tape completely covers the image you want to transfer. You won’t be able to transfer an image that is wider than the width of the packing tape. So, resize the image to fit the width of the packing tape, which is generally 3 inches (7.6 cm).
Step 3 – Remove any air bubbles with the edge of a credit card
Scrape the edge of a credit card along the taped image to remove any air bubbles from the side of the tape. This step is negatory, otherwise, any air bubbles caught between the paper image and the packing tape will cause gaps in the image, when it is transferred to glass. If you don’t have a credit card, you can use something similar in size, such as your driver’s license.
Step 4 – Soak the image in a glass of warm water
After removing the bubbles, now soak the taped image in a glass of warm water. This helps in the image transferring to the tape’s adhesive surface. Let the taped image soak in warm water for 5 to 6 minutes. Ensure, the water is warm but not hot enough to cause the tape and image to melt or deform.
Step 5 – Rub the paper off the back of the tape
Bring out the taped image from the water and place it flat on your work surface. With your index and middle fingers, rub back and forth across the paper side until the paper rolls and flakes off the tape. If the paper doesn’t completely rub off, re-soak it in warm water for a further 2 or 3 minutes. Then, take the image out and rub it off the paper again.
Step 6 – Blow dry the image
After you’ve removed all of the paper, you’ll be left with a strip of packing tape with the image printed on it. Use a blow dryer to completely dry the tape-transferred image. When the tape has dried, you will notice that one side has become sticky again.
Tip: If you don’t have a blow dryer, allow the taped image to dry by air for about 30 minutes.
Step 7 – Press the adhesive side of the image on the glass
After drying the image, it’s now ready to transfer to the glass. Center the tape above the glass and lower the adhesive image until it seems flush with the glass. Then, using your fingers, firmly press the tape onto the glass. To avoid trapping any air bubbles under the tape, begin at either top or bottom of the tape and work your way to the other side.
Tip: If you find any air bubbles after applying the tape, smooth them out with the edge of a credit card.
Conclusion
With a little bit of patience, the required material, and a little Mod Podge / sticky photo paper or packing tape, you can make your own unique photo prints on glass at home in very simple steps. Moreover, if you want to run a business then learn the techniques and start earning today. Both methods require some practice and trials before you hang them fully. Learn these techniques and print photos on the glass that you want to remember forever.